25 Basketball Drills & Ideas
- Oct 29, 2017
- 31 min read

First of all, I want to thank all of the coaches who contributed to this list. I got a lot of ideas from a lot of people for this project, and I also tried to share some of the best drills I've observed over the years. I hope you enjoy it. Here is our list of "25 Basketball Drills & Ideas."
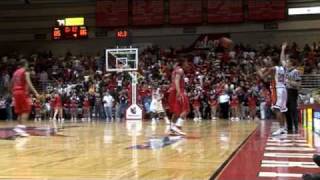
1. "LIONS IN A CAGE" - Coach Brad Botsch, Head Boys Basketball Coach, Bernie High School

This drill helps cut down on turnovers on offense and also helps defense learn to get deflections.
* 2 teams
* Both teams play within the volleyball 10 foot lines or entire vb court.
* One team on defense, the other on offense.
* The offense has to make passes within the boundary lines with no dribbles. Defense must double team the ball and rotate. Offense needs to pivot pass fake etc. We count the number of passes successfully made without a deflection. If the ball is deflected or stolen on the pass, the teams switch.
* First team to 20 passes wins.
* We also vary it to one dribble in the boundaries.
* Another variation is unlimited dribbles inside the entire vb court (getting outside the 10 foot hitting area box). We time that variation, with longest time of possession within 5 possessions for each team being the winner.
The goal is to help minimize turnovers.
2. "Swing Passing Drill" - Josh Herring, Head Girls Basketball Coach, Malden High School

As you can see, Coach Herring was nice enough to draw this up for us. This is a great drill that works on swing passing and shooting.
3. "Pass & Cut, Pass & Layup Warm Up Drills" - Josh Herring, Head Girls Coach, Malden High School

Again, Coach Herring was nice enough to draw this up for us. I love this as a warm up drill, especially when you're working with players in small groups.
4. "Redwing Drill" - Pete McBride, Head Boys Basketball Coach, Eminence High School
We do this drill at least 3 times per week. We split our kids evenly. Each player is in a 1-1, 2-2, 3-3 full court game.
1 on 1 for 1 min- players must play full court pressure man. After everyone finishes we move on to 2-2 full court pressure for 1:30. Then onto 3-3 full court pressure for 2 minutes. We have a coach inbound and deny all passes inbounds. We keep score and the losing team runs a double suicide. We like this drill because it’s great for conditioning and will expose players than aren’t willing to hurt and compete. You can’t hide in this drill! Also it’s team and competitive focused.
5. "32 Advance," Travis Day, Head Boys Basketball Coach, New Madrid County Central High School
How the Drill Works: Players form 3 lines spread out evenly along the baseline. The two outside lines start with a basketball. 3 players progress up the court passing the basketball’s back and forth to the middle player and then finishing the drill with two layups.
Purpose: A fun passing drill that works on catching and passing without traveling, communication, timing, and also layups at the end of the drill.

Setup: Players form 3 lines behind the baseline. The two players on the outside lines have a basketball each. Instructions:The players start to move up the floor as one outside player passes to the player in the middle line.Upon catching the pass, the middle line immediately passes back out to the same player.The middle player will then turn and receive the pass from the other outside player and pass immediately back to them.The players on the outside lines can take 1 - 2 dribbles to avoid traveling.The drill continues up the floor until the players reach the opposite three-point line. When this happens, the two outside players dribble in and finish with a layup.The group then waits at the opposite end for the other groups to finish before going back the other way.
Variations: Midrange or three-point shot - Instead of finishing with a layup, the players can finish with a midrange shot or a three-point shot.Up and back - Instead of waiting at the other end, the group can make two trips of the floor.One basketball - If you’re coaching very young players, you can run this drill with one basketball until they understand how it works.Coaching Points:Passes must be passed in front of the player on the run using proper passing technique.Receiver must have his hands up showing 10 fingers and calling for the pass.Middle player must to catch the basketball and quickly pass on the run. Don’t allow travels!Layup technique is very important for this drill. Watch the footwork and make sure all players are doing it correctly.
6. "Monkey in the middle," Travis Day, Head Boys Basketball Coach, New Madrid County Central High School
How the Drill Works: Players are divided into the groups of three. Each group has one ball. Two passers are lined up 12-15 feet apart. Third man in the group is “monkey in the middle”. He attempts to deflect or steal the basketball. Two outside players must pass to each other without the use of lob passes or dribbling. Just pivoting and using fakes to open up passing space and get the ball past the defender.
Purpose: Fun passing drill while also working on defense. This drill will teach players how to utilize fakes and pivots to create area to pass as well as protecting the basketball.Setup:Groups of 3 players.Each group has one basketball.Passers lined up 12-15 feet apart, with third player (defender) in the middle.

Instructions: The drill begins with the defender playing tight on the player who starts with the basketball. The offensive player utilities pivots and fakes to make a pass to the other offensive player while the defensive player attempts to deflect or steal the pass. After each pass is made, the defender sprints to the receiver and plays tight defense again.When the defensive player gets a steal or deflection, players rotate their positions.Variations:Switch after a certain amount of time – Players can rotate positions after a certain period of time (depending of the age of the players, their strength, and endurance) instead of after every steal and deflection. 30-40 seconds for example.One dribble allowed – Allow the offensive players to make one dribble to open up the passing angle. This will make it tougher for the defensive player.Only bounce passes allowed – To make it harder for the offensive team, only allow them to make bounce passes to the other offensive player.
Coaching Points:
It’s very important for the defender to have active hands and feet at all times. That’s the best way to get steals and make it tough for the offensive players. The offensive players must wait for the defender to recover before making the pass. The purpose of the drill is learning how to create passing gaps and angles. While there’s no set time limit, the offensive player with the basketball shouldn’t hold it for more than 5 seconds at a time without passing.
No lob passes! They make it too easy for the offensive players and will result in little improvement.
7. "Bronze Passing," Travis Day, Head Boys Basketball Coach, New Madrid County Central High School
How the Drill Works:
The team splits up into 4 lines in the half-court corners. Players will then make a one or two-handed pass out in front of the player to their right who start running along the sideline or baseline. The passer then joins the end of the line they passed to.
Purpose: Passing drill intended to use mainly with younger players or as a warm up drill. This drill will improve passing to players on the move as well as being able to catch and pass without dribbling.
Setup:
The team is divided up into 4 lines. One line positioned in each corner of the half-court.
The first player in one of the lines has a basketball.

Instructions:
The drill begins with the player with the basketball passing out in front of the player in the line to the right.
Before the pass is thrown, the receiver must start jogging in the direction of the next line they'll join so that they're catching on the move.
The receiver will then catch the basketball as the next player starts jogging and will make the pass out in front of them.
After each pass, the passer will join the end of the line they passed to.
Drill continues in the same manner with players passing around the square in the same direction.
After a certain period of time, the coach changes the direction of the passing.
Variations:
Include a Second Basketball – If the players are comfortable with one basketball, introduce a second starting in the opposite corner.
Different Passing Types - This drill can be done with one-handed passes, two-handed passes, chest passes, or bounce passes.
One Dribble - Players are allowed to take one dribble before making the pass to the next line. This can be beneficial if you’re doing one-handed passes.
Coaching Points:
The receiver shouldn’t have to slow down or speed up to catch the pass. Passes must be accurate and out in front.
The receiver must time their run so that they’re moving towards the other line and also have their target hands up calling for the basketball.
It’s imperative that you don’t allow any traveling violations while players are running this drill. Don’t allow them to fall into that bad habit.
Run the drill at half-speed when first beginning until the players understand it. Then up the intensity.
8. "Swing Passing," Travis Day, Head Boys Basketball Coach, New Madrid County Central High School
How the Drill Works: Starting on the baseline on the edges of the key, pairs of players will pass one basketball back-and-forth using a variety of passes as they jog down the court to the other baseline. When they get there, they slide back closer to the sideline and return using a variety of passes over the players in the middle of the court.
Purpose: A great warm-up passing drill that provides a lot of passes in a short amount of time. Including passes of different lengths and types for players to practice.
Setup:
All players find a partner.
Each pair has one ball between them.
Pairs divide in two lines behind the baseline on the edge of the key.

Instructions:
The first pair starts by running slowly down the middle of the court passing chest passes to each other.
As soon as the first pair is near the top of the three-point line, the next pair starts.
When the first pair of players gets to the opposite baseline, they slide back closer to the sideline and go back passing over the top of the players in the middle.
When the players get back to the start, they immediately join the middle lines again and continue through the drill continuously.
Every couple of minutes, change the type of passes players perform for the middle lines and the outside lines.
Variations:
Passing for the Middle Lines - For the middle lines, here are a few passes I recommend: Chest passes, bounce passes, one-hand chest passes, and one-hand bounce passes.
Passing for the Outside Lines - For the outside lines, here are a few passes I recommend: Chest passes, overhead passes, one-hand passes.
Remember to take into account the age, strength, and skill level of your team when deciding which passes they should use during the drill.
Coaching Points:
Monitor the pace of the drill; especially if it’s used as one of the warm up drills. Walking shouldn’t be allowed, but also avoid it becoming too intense. Accurate passing is the primary focus of the drill.
Players on the outside lines shouldn’t be putting too much arc on their passes. They should be a height that’s safe enough to clear the middle lines, but direct enough to get to their partner quickly.
Being able to pass one-handed with either hand is an important skill to develop. Expect mistakes when your players are first learning, but make sure you’re practicing them.
Footwork is vitally important during this drill. Players must be able to catch the basketball and make the pass back to their partner within two steps. If you’re coaching young kids and they can’t, slow the drill down.
After each trip down the court, players should switch sides so that they’re practicing throwing short and long passes on both sides of their body.
9. "Net Ball," Travis Day, Head Boys Basketball Coach, New Madrid County Central High School
How the Drill Works: A regular scrimmage with no dribbling of the basketball allowed at any time. Games can be played either 3 on 3, 4 on 4, or 5 on 5.
Purpose: A great drill to improve not only passing, but also moving without the ball, spacing, cutting, etc. This drill will lead to less over-dribbling in games and fewer turnovers.
Setup:
Divide players in two teams depending on the number of players you have available at practice.
Try to make teams similar height and skill level.
The drill only needs one basketball.
Instructions:
Teams play a regular full-court game — without dribbling!
The drill can be run for any length of time.
Scoring System:
The game is played to either 5 or 11.
Each 2-point score is worth 1 point.
Each 3-pointer is worth 2 points.
Must win by 2 points.
In case of a shooting foul, offensive player shoots one free throw for 1 point.
Variations:
Once bounce allowed - Players are allowed to take 1-dribble whenever they get possession. This isn’t a requirement, just an option.
Only bounce passes allowed – Restrict your players too using bounce passes.
3 teams – The drills starts by dividing your team into 3 teams of between 3 - 5 players. Two teams start on defense in each half. Third team is in the middle of the court on offense. The offensive team chooses one side and attempts to score without dribbling. Same scoring system as above. After a score or change of possession, the defense team gets the basketball and attacks going the opposite way. The previous offensive team can play defense until half-court. Play until one team reaches 5 or 11 points.
Coaching Points:

10. 3-2-1, Chris Neff, Head Boys Basketball Coach, Cape Notre Dame High School, St. Joe Lafayette High School.
My first coaching job was the freshman boys basketball coach at Cape Ntore Dame High School. The head coach was a guy named Chris Neff, who taught me an awful lot about basketball. Chris is a great coach, and I thought this was a really clever drill.
The drill starts just like 3 man weave, with 3 lines under the basket and the ball in the center line. The player with the ball dribbles as fast as he can while the two "sprinters" in the outside lanes run as hard as the can.

The player in the middle passes the ball when either sprinter is in range to shoot. We want to throw the ball ahead. When your players get good at this, "1" should be able to hit "2 or 3" in stride as they are pulling up for a three point shot. To do this, 2 and 3 have to "outrun the ball." That is the basic version of the drill. It's simple, but there are a lot of variations and teaching points that make this drill great.
The reason the drill is called 3-2-1 is because the offense gets 3 points for a 3, 2 points for a jumper inside the 3 point line, and 1 point for putting in a rebound IF the rebound was grabbed before the ball hits the floor. If the ball hits the floor, the drill on a rebound, the drill is over and it's time for the next group to go.
TEACHING POINTS... This is why the drill is so good. The guys in line have to really pay attention. I used to say this taught kids how to anticipate a fast break. Watch the play, and you go when the group in front of you is done. So you go when (a) the ball is IN THE NET on a made shot, or (b) when the ball hits the floor on a missed shot. When this happens, we want that next group in line going at full speed... another teaching point, you need the 1 to lead with his pass, lead that shooter into the shot... CRITICAL POINT, you need the shooters to "break down" with their feet while the ball is being passed to them, WHILE THE BALL IS IN THE AIR, they're getting ready to "one-two" with their feet. This prevents a travel, but it also makes them shot ready.
When your kids get really good at it, this is how the drill looks:

Now we have lines going on both sides of the court, criss crossing, going nonstop. We just told everybody "go to the right" when you're running by each other. Keep your head up. THERE ARE GOING TO BE DEFENDERS IN THE GAME, RIGHT? Just watch where you're going.
But you just watch the group in front of you in the line. When they score (ball is in the net) or they miss and the ball hits the floor, you go. Once you get to the other end, just get in line down there. We would run this drill for 5 minutes and see how many we could score. Everybody is on the same team. We would try to put up 150 points (scoring 3-2-1) in 5 minutes. When we broke that mark, everyday we'd come in and try to break our own record.
The kids LOVED this drill. I loved it because it taught anticipation, you had to pay attention, it worked on dribbling and passing ahead, it worked on catching and footwork, it worked on crashing the offensive glass, etc. We even put variations in where you had to tip in the rebound. This is a really fun drill, especially with a bigger group (15-20 players). **NOTE: I think it's really important that you rotate all kids through all lines... guards, posts, etc... you want your posts in the middle line, because a lot of times they're the one who rebound and start the break, but you want them sprinting also. The same is true for guards. You want them sprinting for shots and outlet passes, but you also want them starting the break as your primary ball handler. So rotate lines. This is a "positionless" drill.
11. Cycles, Paul westhead, Head Mens Basketball Coach, Loyola Marymount College
I got this watching a tape of Paul Westhead when I was in college. I loved the teams he coached Loyola because they averaged over 120 points per game. I was a huge fan of the star of that team, Hank Gathers, who died tragically on the court.
This was our primary fast break drill. It builds off of the last drill, 3-2-1, but now we are in positions as "numbers" in this break. We actually built our entire fast break, press break, and parts of our offense by using these numbers to create our terminology and basic language that we spoke as a team.
In this drill, we tried to run all 5 "cycles" and make all 5 shots (2.5 trips) in 30 seconds or less. This is a diagram of the lanes. There is a video below.

Here is a great video explaining Cycles.
12. "War in the Paint," Tom Izzo, Michigan State University
War in the Paint. This might have been my favorite drill we did. I got this one from Tom Izzo. We lined up kind of like the shell drill. 4 guys outside the 3 point line. 4 defenders, each facing their own man, but the defenders are all inside the paint. The coach has the ball at the foul line, and what you want to do is shoot a nice, soft shot that hits the side of the rim or is a good, soft bounce that is a realistic rebound.
The rules are simple. The defense has to start out in a "ball you man" position. In other words, I don't want them facing the goal. I want them to stand like they'd stand in a game. The ball is HERE, your man is THERE, so see both.
When the shot goes up, DEFENSE, don't let them make it into the paint. You want to take a step towards that offensive player (who is crashing) and "stick and go." That's how we taught it. You can't hold a perimeter blockout for 2-3-4 seconds, not against a good player. You want to check him with a forearm and your body, and then go to the glass. Get a piece of him, and then go rebound. That's the only rule. Hit them and I mean HIT THEM before they make it to the paint. The offensive players, what we always told them, was "good players don't get blocked out." Ronnie Cookson used to always say, "you don't know where I'm going to go" in regards to offensive rebounding. The only way they can really "block you out" is if you run into their back. So we taught those offensive players just sprint by them, zig zag... or use a swim move, anything to get past the defender, or AT LEAST GET EVEN.
That's the trick to offensive rebounding. At least get even. If you're not blocked out, and you're even, shoulder to shoulder, now it's a 50-50 ball. It's whoever wants it the most. But this was a great drill. I think most coaches teach boxing out and teach rebounding, but the drills are only as good as THE OFFENSIVE REBOUNDING. In other words, if you're blocking out guys who are just standing there, yeah, you look great boxing out in those drills. Then you get in a game where it's live bodies coming in there, and you can't get a rebound. We stressed to our guys, you can't get blocked out. Go get it.
Once the ball went up, that was the only rules. Defense, don't let them in the paint. Offense, don't get blocked out. This is a very, very physical drill. We played until there was a finish. If the offense came up with the rebound, they went back up again, and again, and again until they scored or the defense got the rebound.
There are different variations of this. You can say "defense has to get 3 rebounds in a row" before they get out. Or you can say "winners stay on offense" because the kids loved staying on offense. Or you could put sprints on it. Either way, make a winner and a loser, and this is a great drill. We had a lot of bloody noses over the years, some stitches, but this is the #1 rebounding drill we ever did. We only did it for FOUR MINUTES per day. That's it. 4 minutes. but we literally did this every single day. Great toughness drill.
13. "4 vs 3, 3 vs 4, 4 vs 3 Conversion Drill" - Travis Day, Head Boys Basketball Coach, New Madrid County Central High School
I also like 4 v 3/ 3 v 4/ 4 v 3 conversion drill.
Start the drill with 4 on offense vs 3 on defense, and the defense must scramble.
The next part of the drill is conversion. The team with 4 must trap the team with 3 full court. Finally, the last section is the final conversion where the 3 defense scramble against the 4 offense again.
Then we switch teams and go again. We run this drill for 5 minutes.
14. "4-4-4 Gut Check," Travis Day, Head Boys Basketball Coach, New Madrid County Central High School
I like 4 v 4 v 4 gut check, you play defense in the half court, if you get stop you stay on defense and you yell out your stop number! If you get stopped you must run to opposite end of gym. We have a coach there near a ball rack. They must run around the rack and do push ups.
While they are doing this the third team is on offense, if you score you “get to” play defense. The team with the most stops wins. You can play with more teams if you want.
**Coaches enter a new ball and team quickly after each stop.
15. "Vegas," Brandon Blankenship, Head Boys Basketball Coach, Risco High School
We call this drill "Vegas" and it is a full court running, passing, layup drill. There are three different ways we do this drill with 3 different names. 1) Vegas - Baseball 2) Vegas - Tip 3) Vegas - Split
On each of the 3 ways you do the same thing going down the court. The variance will be on your way back to the basket you started. The drill begins with 3 lines underneath the basket like you would for 3 - man weave, etc. For our purposes we will call the positions left wing, middle, and right wing.
The ball starts in the middle. The players will run down the court with each player staying in their "lane". As the players begin to move down the court, the middle man will throw the pass to the right wing who will return the pass to the middle man. The middle man then passes to the left wing who then passes the ball across to the right wing for the lay-up. The left wing who passed the ball for the lay-up will "loop through" the free throw lane area and begin heading to the other basket down the opposite side of the court they began. The right wing who shot the lay-up will move out to about free-throw line extended on the opposite side of the court they shot they lay-up.
The middle man will rebound the lay-up and kick it out to the right wing who just shot the lay-up. ***This basic pattern down and kick-out will be done in each of the variations.
(Baseball) On the way back once the kick out has happened, the right wing who just shot lay up will throw a baseball pass to the left-wing streaking to the basket where the drill began. The right wing who made the baseball pass and the middle man who rebounded then run down the sideline to return to their lines. Players should rotate lines each time. (Tip) On the way back on this variation the left-wing who looped through after making the pass for the lay-up will go to about the jump circle at half court. Once the middle man rebounds the ball and kicks it out, this time instead of a baseball pass all the way down the court the right wing will kick the ball ahead to the left wing at half court. He will follow his pass and the middle man will follow in behind him. The left wing who caught the ball at half court will dribble hard to the basket and tip the ball up off the backboard with the passer following him for a tip off the backboard and the middle man catches it off the glass and tips it in. (Split)
On the way back on this variation, the left-wing who looped through after making the pass for the lay-up will streak down towards the free throw line of the basket the drill began. Once the middle man rebounds the ball and kicks it out to the right wing he will throw the pass ahead to the left wing. The left wing will catch the pass and jump stop at around the free throw line and he will face where he received the pass from. The right wing who threw the pass will cut out wide and then cut back in front of the man with the ball for a fake hand off. The middle man who rebounded the ball and kicked it out to the right wing will at the same time cut wide to his left and then be the second cutter coming around for a right handed lay-up.
This is a great drill for conditioning. A lot of times we will do each variation for anywhere from 1-2 minutes. We might put 4:30 on the clock and switch every 1:30. Sometimes we give them a certain number of lay-ups to make in the allotted time, and other times we may count bad/dropped passes and missed lay-ups and have them run for mistakes.
16. "3 vs. 7 Full Court" - Eric Thompson, Basketball GURU from parts unknown
A team of 3 has to go full ct. vs 7 players.
The team of three can only pass and can't leave the drill until they score.
The team of seven has no specific rules except make it really hard for the team of three.
The team of seven can convert on a steal (they may dribble), and when they make the basket, the team of three must inbound the ball just like a regular game but passing only.
A few things that this drill helps:
Team of three: How to work through frustration, how to collectively bring the ball up vs good pressure, improving (eventually) the clarity of thinking under pressure. Sometimes they get lucky and score quick. Don't worry there will be another day, with a different combination haha.
Team of seven: How to read the passer's eyes and body, become more aggressive in trying to steal, to immediately look down the floor and advance the ball with a pass.
You can always add a player if the team of three is taking a really long time, but let them get prety frustrated before you offer them any help.
17. "Net Touch" - Doug Stotler, Head Mens Basketball Coach, Lewis & Clark Community College
Coach Heeb, One of my favorite 1 on 1 defensive drills is Net Touch.
Offensive player starts at foul line facing the basket. No basketball is used. (Later you can make the offense use a 5# medicine ball and he must keep both hands of the ball and touch the net with the medicine ball.)
Defensive player starts at foul line too, facing the offensive player.
The offensive goal is to touch the net at the basket.
The defensive goal is to prevent a net touch for as long as possible.
If this is done right it becomes a very physical battle between the players.
You will quickly learn who the tough kids are.
Rules:
Offensive player cannot go out of the lane or out of bounds. Offense can use any type of move but he cannot use his hands or arms to clear the defender out.
Defender cannot use his hands either. Defender must move his feet and use his chest to defend the net. He simply cannot let the offense touch the net.
There a many ways to score this drill.
i. How many times does defense turn the offense.
ii. How many net touches can the offense get.
iii. How many seconds does defender hold off the offense from a net touch.
iv. Run the drill and try to take a charge at exact time that the offense initiates the contact.
v. Run the drill using a blocking pad to put emphasis on offensive toughness and playing through contact.
vi. Keep team scores-split your team and reward the team that gets the most net touches or make the team the gave up the most net touches do a difficult defensive slide drill.
vii. Incorporate transition and on all net touches and change from offense to defense by touching the foul line and baseline. (Offense transition to defense and touches baseline before sprinting to foul line; Defense transitions to offense and must touch foul line before attempting a net touch.
viii. Make up your own way to score the drill.
18. "Point Wing Deny," Lennies McFerren (HOF), Head Boys Basketball Coach, Charleston High School. New Madrid County Central High School, Kennett High School
Coach Mac did not send this drill to me for this list, but he did teach it to me. I want to give him credit for this idea and not put my own name by it! This is the best drill I've ever seen for teaching win denial and "jumping to the ball" once the ball is no longer "one pass away."
The ball starts near the point. The defender denies the wing. We want this defender "up the line" so that he is in position to deny AND help if there is dribble penetration on his side. I've seen Coach Mac make this defender deny for 2-3 seconds (1-2 trips to the block and back to the wing) or for 20-30 seconds (if he didn't think that player was giving max effort).
Now the ball is swung to the other side of the floor. This can be two players up top, it can be a coach and a manger, etc. But when the ball swings, (a) the offensive player must go touch the block, and (b) the defender has to jump to the ball, get to the mid line, etc.
The offensive player is now going to cut towards the ballside elbow. The defender has to smash this cutter, denying the ball. If he does it right, (pictured below) he will be looking over his left shoulder at the ball while "chucking" or arm barring with his right arm.
Once the offensive player touches the elbow area, he is going to "slide" down to the low box to post up. The defender has to "flip his hips" and shoulders, now denying over his right shoulder. He will stay and deny the post until the offensive player with the ball takes a dribble. At that point, the cutter is going to pop out again, and we'll deny the wing on the other side of the floor.
Now we're denying the right wing, the same way we started the drill on the left wing. I've seen Coach Mac make this kid work for a long time or reward him by letting him out after only a few seconds.
TO RECAP, this is the general pattern of the offensive player. It kind of looks like a W, and I've actually heard some coaches call this "The W Drill."
This is a terrific drill. You're denying the wing, jumping to the ball in help, denying a flash cut, denying the post, and denying the wing again. This is a 15-20 second drill, or it's a long conditioning drill. It's up to the coach. **NOTE, I've seen Coach Mac finish this drill by making the wing catch it on the right side, and then having the defender get over and cut off a baseline drive for a charge. You don't have to do that, but it's a good way to make kids take charges.
19. Partner Pivots, Gene Bess, Head Mens Basketball Coach, Three Rivers College
Coach Bess (winningest coach at any level of college basketball) did not send me this drill for the purpose of this list, but again, I want to give credit where it's due. I took my team to watch TRC practice during my second season as a head coach. I was 23 years old. I've used this drill to teach footwork and toughness ever since. It's simple, but it's a terrific drill.
Every player has a ball and a partner. You can do this anywhere in the gym. You don't have to be at a basket because nobody is going to shoot the ball.
Let's pretend you (the reader) are guarding me (good luck haha). I have the ball, and you're standing right behind me. I flip the ball out a couple of feet, giving myself a "self toss." When I do this, I'm going to go catch it on a jumpstop, while still having my back to you. While I'm doing this, you're walking into my back, trying to crowd me and make it hard to "face up."
On my jumpstop, I'm going to turn and face whatever basket we're "playing at." Again, I can be 50 feet from the goal. That part doesn't matter because I'm not shooting. I do think it's important to teach kids to face the basket, so just pick a goal. But I'm going to turn and face. You're going to crowd me, slap me, grab my arm, poke me, etc. My job is to pivot and be strong. Your job is to foul me (not hurt me) and see if I'll cough the ball up.
TEACHING POINTS... I'm a right handed player, so I'm ALWAYS going to pivot on my left foot in this drill. Always. I can front pivot, reverse pivot, etc, but it has to be a left foot pivot. If you're left handed, pivot on your right foot... I want to "take the space" between us. I don't want you to rock my on my back foot, where I'm in a "weak" position and can't pass. I want to step into that space with my hip and shoulder, protecting the ball... This should be a constant "step over" (step into the space, ripping the ball 'high to low' while you step) and "sweep under" (stepping back away from the defense, ripping the ball LOW, by your knee caps, while you create space). We preached this "step over, sweep under" over and over.
If your team isn't tough, make them do this for 10-15 seconds. Then yell switch. Now I would guard you, and you'd do the same thing. Once they get good at it, and start playing strong with the ball, do it 4-5 seconds and switch. Early on, you might have to spend more time on this, but once we got good at it WE DID THIS DRILL FOR ONE MINUTE to start every practice. It's amazing what doing this for just a minute every day will do.
20. "1 vs 2 Rebounding," Drew Hanlen, Pure Sweat
This drill was shared with me by Coach Tyler Victor at Columbia Battle High School. He got this from Pure Sweat, run by Drew Hanlen. I think Drew does a great job, and for those of you that didn't know, Drew is a Missouri guy, from Webster Groves, where he played for Jay Blossom, one of the top coaches in the state of Missouri.
This is a great drill. Two defenders box out one offensive player. The defense doesn't try to get the ball, but rather just boxes out and tries to keep the offensive player from getting to the ball. If the offense gets the ball in the air, it's worth two points. If the offense can get to the ball after one bounce, it's one point. If the defense can box out the offensive player for two bounces, the defense gets one point.
21. "Full Court Ball Handling," David Heeb, but I borrowed most of this idea from Coach Forrest Larson (100 Trips, a Full Court Workout)
This is a drill I made up, borrowing ideas from a video by Coach Forrest Larson. His video was a 100 trip workout, the first coaching video I ever bought. I was terrific, but I had to adapt it for a group of 20-25 players, the size of my JV and Varsity combined.
So here is what I came up with. We put players in the four corners of the gym. Every player has a ball. They are to dribble the entire time they are in this drill. While in line, they do whatever "move" we call out... figure 8, windshield wipers, spider dribble, pound dribble, etc, just basic ball handling drills... They always dribble with their outside hand. So if they're going down the side where their left hand is outside, and they're shooting a left handed layup, then they would do a left handed dribble move in line.
Here is the basic diagram:
The drill starts with "1" and "3" going full court, full speed for a layup. 1 is shooting a right handed layup, because he is on the right side. 3 is also dribbling with his right hand, but that "side" (3 and 4) are pulling up for 5-10 foot jumpers off of the dribble (this keeps players from running into each other while shooting layups). Once 1 shoots, 2 goes full court, with his left hand (outside hand), and shoots a layup (they're on the "layup side"). 1 goes to the end of the "2" line (1 and 2 stay on the same side of the floor). Once 3 shoots, 4 goes. He dribbles with his left hand (outside hand) and pulls up for a 5-10 foot jumper (they're on the jumper side). 3 goes to the end of 4's line (3 and 4 stay on the same side).
Eventually, after 2-3 minutes, you yell "switch" and now 3 and 4 shoot the layups, and 1 and 2 are shooting jumpers. For the entire 4-5-6 minutes of this drill, we're switching the dribble move in line(figure 8, pound dribble, etc), and we're switching the move the players make going down the floor (speed dribble, crossover, stutter step, etc). If we make a move going down the floor, we can make it at half court, or we can make a move at each hashmark (2 moves per trip).
I love this drill. It's 4-5-6 minutes of nonstop running, shooting layups off of the proper foot with the proper hand, dribbling with your head up, and it incorporates very basic ball handling moves (stutter step, speed dribble), to more complex moves (behind the back, double moves, etc).
We did this drill everyday, usually as one of our first 2-3 drills of practice, or as a conditioner at the end of practice. We taught all of our kids to dribble, pass, and shoot (think about this and 3-2-1 together). I think it's really important, especially with young kids, to not work exclusively in "guards and posts." Teach them all to be comfortable with the ball in their hands.
22. "CHANGE!" Coach Bob Knight (HOF), Head Mens Basketball Coach, Indiana University, Texas Tech University
One of the highlights of my career was getting to go see Coach Knight run a practice before he retired. We drove all the way to Lubbock, Texas to watch them practice for three days. This "change" drill was one of the smartest, simplest ways to teach transition defense and critical basketball thinking that I've ever seen.
The drill goes like this... You have your team in a controlled scrimmage. They're going up and down, working on whatever you have them working on that day. In the middle of a play, Coach Knight would yell "CHANGE!" No matter what was happening, the offensive player with the ball had to lay the ball on the ground, and the defense tried to grab the ball and fast break before the offense (now on defense) could get back.
It was basically Coach Knight "forcing" a turnover. The offense, now on defense, had to scramble back. He put this rule in, the man who set the ball down couldn't guard the ball. Think about how smart that is... a lot of times, the player that turns the ball over is not in position to stop the ball. Somebody else has to stop the ball, and then we all have to communicate and get matched up.
I love this drill. I think it is going to make your players think, it's going to force them to get back, it's going to force them to talk and get matched up. Vice versa, I think this is a really good offensive drill. It teaches players to attack and move it quick and be opportunistic with a quick turnover. Bottom line, this drill will make your team smarter.
23. "Creative 1 on 1," Spencer Hoffman, Head Girls Basketball Coach, Riverside High School
Coach Hoffman taught me this drill while I was watching him run individual workouts. While there are some well known skills trainers out there (Pure Sweat, etc), I would put Coach Hoffman right up there at the top in regards to his teaching ability. He's as good as anybody I've ever seen when it comes to working one on one with players.
This is a really simple drill, so I won't use a diagram. Coach Hoffman would line two kids up at random spots on the floor... one on each block, one on each wont, one at each elbow, etc... then he would set 2 cones out somewhere.
Coach would then just change the rules as he went, trying to make kids have to score from different angles, or make the defender have to "get there" and find a way to get squared up from different angles. I thought this was really clever and a great way (and fun way) to teach kids to play in 1 on 1 situations.
FOR EXAMPLE, put a player on each block. Set a cone on each elbow (adjust the defender's cone accordingly if the defense keeps getting beat). When the coach says "go" (or blows a whistle), the offensive player has to dribble around the cone as quickly as possible and try to score. At the same time, the defender is running around the cone and trying to square up to stop the offensive player.
If you use your imagination, you can put players in positions where they have to finish at tough angles, or where they have to beat the defense to a spot on the floor. This is also a great ball handling drill because it teaches players not to waste a dribble. They have to get there!
24. ABC, David Heeb
This is a drill I made up based on a variety of other drills I saw. It's a simple drill. There are three teams, Team A, Team B, and Team C (hence the name ABC). Each team ideally has 5 players. If you want, you can rotate another team (Team D) into the rotation, or you can have 6-7 players per team and have them sub as the drill progresses.
There are different ways to play this (cut throat, where the winner stays on), but I liked this drill best when Team A plays offense and then stayed on that end to play defense. Team B, who just got off of defense, would then take the ball down the floor to play against Team C. After playing defense, Team C would take the ball and go back to play against Team A.
This is where we mixed it up in this drill. While A had the ball, and B was guarding, I would use a hand signal to tell C what defense to play (fist = man, 2 = 2-3, etc). C would communicate to each other (mandatory) what defense they were playing. Now when B got the ball and brought it down to play against C, they had to diagnose the defense and call out the right play (2-3 = 3 out zone offense, man = flex, etc). While B was attacking C's defense, I held up a hand signal to A, changing their defense. Now when C brought the ball up to attack A's defense, they had to correctly identify the defense and call out the right play.
Because we were such an uptempo team, and we scored a lot on the fast break and press during our actual scrimmage, I found this drill to be very beneficial for working on our half court defense and our half court offensive execution.
25. "Transition," David Heeb
This is a drill that I saw Coach Steve Smith (Oak Hill Academy) run at a Nike Clinic, but he ran it as a 3 on 3 transition drill. I liked the drill so much that I came up with a 5 on 5 version, and I put slightly different rules in it.
The basic setup of the drill is two teams (virtually unlimited number of players) with 4 lines under each basket. To start the drill, it is a game of 5 on 5 on one end of the floor.

When the O's (offense) are done with this possession, just like in a real game, what are they supposed to do? GET BACK! It's that simple. All 5 guys on offense get back, because the defense is running!
Whichever X winds up with the ball (steal, rebound, grabs the made shot, etc) gets to stay in the drill. He pushes, and the 4 X's in line are all running with him. The 4 X's who just came out of the drill, who didn't get the ball, get in line with the other X's and wait for their next turn.
Because the X's in line are sitting there "on go" ready to run, they should have an early advantage on the O's, who were playing offense and are now scrambling to get back. This makes this drill a great transition defense drill. It really challenges your "get back principles, and it also makes the offense attack because they have the advantage, but because it's a 5 on 5 drill, it teaches kids to just run the offense if they don't get the shot they want. You can actually run your real offense out of this drill. That's why I like it so much.
So now the ball is on the other end of the floor.

Same question, "when the X's get done with offense, in a real game, what are all 5 guys doing?" GETTING BACK! It's that simple. Whichever O on the floor grabs it (steal, rebound, made shot) runs with the 4 O's sprinting out of line. If the O's get a great shot in transition, take it. If they don't, run your offense.
This is a great drill. It makes your defense get back, it reinforces your "get back" team concept (point guard checks back, deepest man checks back, whatever your system is, etc). It makes your kids talk in transition and get matched up. I also think it's a great offensive drill. It makes your kids "know when to hold em and know when to fold em." Is this a great shot? Then let's take it. If it's not, let's just run our offense.
BONUS BASKETBALL IDEA
REMEMBER, basketball is a lot easier to coach when your X's look like this and their O's look like this LOL! Talent matters!! It's our job as coaches to maximize the talent on our team. Best of luck to everybody this season. If you like this list, and you want to add yourself to our mailing list (free), just click on this link. You can also reach me at coach.david.heeb@gmail.com with any questions.


Comments